SQL Statements
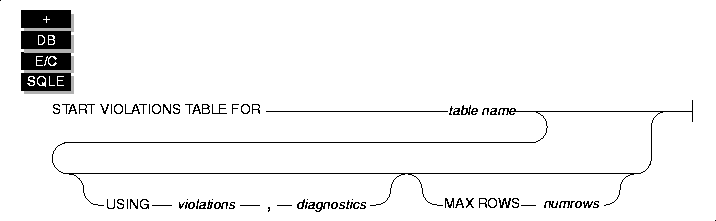
START VIOLATIONS TABLE
The START VIOLATIONS TABLE statement creates a violations table and a diagnostics table for a specified target table. The database server associates the violations and diagnostics tables with the target table by recording the relationship among the three tables in the sysviolations system catalog table.
Syntax
Usage
The START VIOLATIONS TABLE statement creates the special violations table that holds rows that fail to satisfy constraints and unique indexes during insert, update, and delete operations on target tables. This statement also creates the special diagnostics table that contains information about the integrity violations caused by each row in the violations table.
Relationship of START VIOLATIONS TABLE and SET Statements
The START VIOLATIONS TABLE statement is closely related to the SET statement. If you use the SET statement to set the constraints or unique indexes defined on a table to the filtering object mode, but you do not use the START VIOLATIONS TABLE statement to start the violations and diagnostics tables for this target table, any rows that violate a constraint or unique-index requirement during an insert, update, or delete operation are not filtered out to a violations table. Instead you receive an error message indicating that you must start a violations table for the target table.
Similarly, if you use the SET statement to set a disabled constraint or disabled unique index to the enabled or filtering object mode, but you do not use the START VIOLATIONS TABLE statement to start the violations and diagnostics tables for the table on which the objects are defined, any existing rows in the table that do not satisfy the constraint or unique-index requirement are not filtered out to a violations table. If, in these cases, you want the ability to identify existing rows that do not satisfy the constraint or unique-index requirement, you must issue the START VIOLATIONS TABLE statement to start the violations and diagnostics tables before you issue the SET statement to set the objects to the enabled or filtering object mode.
Starting and Stopping the Violations and Diagnostics Tables
After you use a START VIOLATIONS TABLE statement to create an association between a target table and the violations and diagnostics tables, the only way to drop the association between the target table and the violations and diagnostics tables is to issue a STOP VIOLATIONS TABLE statement for the target table. For further information see the STOP VIOLATIONS TABLE statement on page 1-767.
Examples of START VIOLATIONS TABLE Statements
The following examples show different ways to execute the START VIOLATIONS TABLE statement.
Starting Violations and Diagnostics Tables Without Specifying Their Names
The following statement starts violations and diagnostics tables for the target table named cust_subset. The violations table is named cust_subset_vio by default, and the diagnostics table is named cust_subset_dia by default.
Starting Violations and Diagnostics Tables and Specifying Their Names
The following statement starts a violations and diagnostics table for the target table named items. The USING clause assigns explicit names to the violations and diagnostics tables. The violations table is to be named exceptions, and the diagnostics table is to be named reasons.
Specifying the Maximum Number of Rows in the Diagnostics Table
The following statement starts violations and diagnostics tables for the target table named orders. The MAX ROWS clause specifies the maximum number of rows that can be inserted into the diagnostics table when a single statement, such as an INSERT or SET statement, is executed on the target table.
Privileges Required for Starting Violations Tables
To start a violations and diagnostics table for a target table, you must meet one of the following requirements:
Structure of the Violations Table
When you issue a START VIOLATIONS TABLE statement for a target table, the violations table that the statement creates has a predefined structure. This structure consists of the columns of the target table and three additional columns.
The following table shows the structure of the violations table.
Relationship Between the Violations and Diagnostics Tables
Users can take advantage of the relationships among the target table, violations table, and diagnostics table to obtain complete diagnostic information about rows that have caused data-integrity violations during INSERT, DELETE, and UPDATE statements.
Each row of the violations table has at least one corresponding row in the diagnostics table. The row in the violations table contains a copy of the row in the target table for which a data-integrity violation was detected. The row in the diagnostics table contains information about the nature of the data-integrity violation caused by the bad row in the violations table. The row in the violations table has a unique serial identifier in the informix_tupleid column. The row in the diagnostics table has the same serial identifier in its informix_tupleid column.
A given row in the violations table can have more than one corresponding row in the diagnostics table. The multiple rows in the diagnostics table all have the same serial identifier in their informix_tupleid column so that they are all linked to the same row in the violations table. Multiple rows can exist in the diagnostics table for the same row in the violations table because a bad row in the violations table can cause more than one data-integrity violation.
For example, a bad row can violate a unique-index requirement for one column, a not null constraint for another column, and a check constraint for yet another column. In this case, the diagnostics table contains three rows for the single bad row in the violations table. Each of these diagnostic rows identifies a different data-integrity violation that the nonconforming row in the violations table caused.
By joining the violations and diagnostics tables, the DBA or target table owner can obtain complete diagnostic information about any or all bad rows in the violations table. You can use SELECT statements to perform these joins interactively, or you can write a program to perform them within transactions.
Initial Privileges on the Violations Table
When you issue the START VIOLATIONS TABLE statement to create the violations table, the database server uses the set of privileges granted on the target table as a basis for granting privileges on the violations table. However, the database server follows different rules when it grants each type of privilege.
The following table shows the initial set of privileges on the violations table. The Privilege column lists the privilege. The Condition column explains the conditions under which the database server grants the privilege to a user.
The following rules apply to ownership of the violations table and privileges on the violations table:
If you do not have the Insert privilege on the violations and diagnostics tables, the database server executes the INSERT, DELETE, or UPDATE statement on the target table provided that you have the necessary privileges on the target table. The database server does not return an error concerning the lack of insert permission on the violations and diagnostics tables unless an integrity violation is detected during the execution of the INSERT, DELETE, or UPDATE statement.
Similarly, when you issue a SET statement to set a disabled constraint or disabled unique index to the enabled or filtering mode, and a violations table and diagnostics table exist for the target table, you must have the Insert privilege on the violations and diagnostics tables.
If you do not have the Insert privilege on the violations and diagnostics tables, the database server executes the SET statement provided that you have the necessary privileges on the target table. The database server does not return an error concerning the lack of insert permission on the violations and diagnostics tables unless an integrity violation is detected during the execution of the SET statement.
Example of Privileges on the Violations Table
The following example illustrates how the initial set of privileges on a violations table is derived from the current set of privileges on the target table.
For example, assume that we have created a table named cust_subset and that this table consists of the following columns: ssn (customer's social security number), fname (customer's first name), lname (customer's last name), and city (city in which the customer lives).
The following set of privileges exists on the cust_subset table:
Now user alvin starts a violations table named cust_subset_viols and a diagnostics table named cust_subset_diags for the cust_subset table, as follows:
The database server grants the following set of initial privileges on the cust_subset_viols violations table:
- User alvin is the owner of the violations table, so he has all table-level privileges on the table.
- User barbara has the Insert, Delete, and Index privileges on the violations table. She also has the Select privilege on the following columns of the violations table: the ssn column, the lname column, the informix_tupleid column, the informix_optype column, and the informix_recowner column.
- User carrie has the Insert and Delete privileges on the violations table. She has the Update privilege on the following columns of the violations table: the city column, the informix_tupleid column, the informix_optype column, and the informix_recowner column. She has the Select privilege on the following columns of the violations table: the ssn column, the informix_tupleid column, the informix_optype column, and the informix_recowner column.
- User danny has no privileges on the violations table.
Using the Violations Table
The following rules concern the structure and use of the violations table:
- Every pair of update rows in the violations table has the same value in the informix_tupleid column to indicate that both rows refer to the same row in the target table.
- If the target table has columns named informix_tupleid, informix_optype, or informix_recowner, the database server attempts to generate alternative names for these columns in the violations table by appending a digit to the end of the column name (for example, informix_tupleid1). If this attempt fails, the database server returns an error, and the violations table is not started for the target table.
- When a table functions as a violations table, it cannot have triggers or constraints defined on it.
- When a table functions as a violations table, users can create indexes on the table, even though the existence of an index affects performance. Unique indexes on the violations table cannot be set to the filtering object mode.
- If a target table has a violations and diagnostics table associated with it, dropping the target table in cascade mode (the default mode) causes the violations and diagnostics tables to be dropped also. If the target table is dropped in the restricted mode, the existence of the violations and diagnostics tables causes the DROP TABLE statement to fail.
- Once a violations table is started for a target table, you cannot use the ALTER TABLE statement to add, modify, or drop columns in the target table, violations table, or diagnostics table. Before you can alter any of these tables, you must issue a STOP TABLE VIOLATIONS statement for the target table.
- The database server does not clear out the contents of the violations table before or after it uses the violations table during an Insert, Update, Delete, or Set operation.
- If a target table has a filtering-mode constraint or unique index defined on it and a violations table associated with it, users cannot insert into the target table by selecting from the violations table. Before you insert rows into the target table by selecting from the violations table, you must take one of the following steps:
If it is inconvenient to take either of these steps, but you still want to copy records from the violations table into the target table, a third option is to select from the violations table into a temporary table and then insert the contents of the temporary table into the target table.
Example of a Violations Table
To start a violations and diagnostics table for the target table named customer in the stores7 demonstration database, enter the following statement:
Because your START VIOLATIONS statement does not include a USING clause, the violations table is named customer_vio by default. The customer_vio table includes the following columns:
The customer_vio table has the same table definition as the customer table except that the customer_vio table has three additional columns that contain information about the operation that caused the bad row.
Structure of the Diagnostics Table
When you issue a START VIOLATIONS TABLE statement for a target table, the diagnostics table that the statement creates has a predefined structure. This structure is independent of the structure of the target table.
The following table shows the structure of the diagnostics table.
Initial Privileges on the Diagnostics Table
When the START VIOLATIONS TABLE statement creates the diagnostics table, the database server uses the set of privileges granted on the target table as a basis for granting privileges on the diagnostics table. However, the database server follows different rules when it grants each type of privilege.
The following table shows the initial set of privileges on the diagnostics table. The Privilege column lists the privilege. The Condition column explains the conditions under which the database server grants the privilege to a user.
The following rules concern privileges on the diagnostics table:
If you do not have the Insert privilege on the violations and diagnostics tables, the database server executes the INSERT, DELETE, or UPDATE statement on the target table provided that you have the necessary privileges on the target table. The database server does not return an error concerning the lack of insert permission on the violations and diagnostics tables unless an integrity violation is detected during the execution of the INSERT, DELETE, or UPDATE statement.
Similarly, when you issue a SET statement to set a disabled constraint or disabled unique index to the enabled or filtering mode, and a violations table and diagnostics table exist for the target table, you must have the Insert privilege on the violations and diagnostics tables.
If you do not have the Insert privilege on the violations and diagnostics tables, the database server executes the SET statement provided that you have the necessary privileges on the target table. The database server does not return an error concerning the lack of insert permission on the violations and diagnostics tables unless an integrity violation is detected during the execution of the SET statement.
Example of Privileges on the Diagnostics Table
The following example illustrates how the initial set of privileges on a diagnostics table is derived from the current set of privileges on the target table.
For example, assume that there is a table called cust_subset and that this table consists of the following columns: ssn (customer's social security number), fname (customer's first name), lname (customer's last name), and city (city in which the customer lives).
The following set of privileges exists on the cust_subset table:
Now user alvin starts a violations table named cust_subset_viols and a diagnostics table named cust_subset_diags for the cust_subset table, as follows:
The database server grants the following set of initial privileges on the cust_subset_diags diagnostics table:
Using the Diagnostics Table
For information on the relationship between the diagnostics table and the violations table, see "Relationship Between the Violations and Diagnostics Tables".
The following issues concern the structure and use of the diagnostics table:
- The MAX ROWS clause of the START VIOLATIONS TABLE statement sets a limit on the number of rows that can be inserted into the diagnostics table when you execute a single statement, such as an INSERT or SET statement, on the target table.
- The MAX ROWS clause limits the number of rows only for operations in which the table functions as a diagnostics table.
- When a table functions as a diagnostics table, it cannot have triggers or constraints defined on it.
- When a table functions as a diagnostics table, users can create indexes on the table, even though the existence of an index affects performance. You cannot set unique indexes on the diagnostics table to the filtering object mode.
- If a target table has a violations and diagnostics table associated with it, dropping the target table in the cascade mode (the default mode) causes the violations and diagnostics tables to be dropped also. If the target table is dropped in the restricted mode, the existence of the violations and diagnostics tables causes the DROP TABLE statement to fail.
- Once a violations table is started for a target table, you cannot use the ALTER TABLE statement to add, modify, or drop columns in the target table, violations table, or diagnostics table. Before you can alter any of these tables, you must issue a STOP TABLE VIOLATIONS statement for the target table.
- The database server does not clear out the contents of the diagnostics table before or after it uses the diagnostics table during an Insert, Update, Delete, or Set operation.
- If the target table that is specified in the START VIOLATIONS TABLE statement is fragmented, the diagnostics table is fragmented with a round-robin strategy over the same dbspaces in which the target table is fragmented.
Example of a Diagnostics Table
To start a violations and diagnostics table for the target table named stock in the stores7 demonstration database, enter the following statement:
Because your START VIOLATIONS TABLE statement does not include a USING clause, the diagnostics table is named stock_dia by default. The stock_dia table includes the following columns:
This list of columns shows an important difference between the diagnostics table and violations table for a target table. Whereas the violations table has a matching column for every column in the target table, the columns of the diagnostics table do not match any columns in the target table. The diagnostics table created by any START VIOLATIONS TABLE statement always has the same columns with the same column names and data types.
References
See the STOP VIOLATIONS TABLE and SET statements in this manual.
For information on the system catalog tables that are associated with the START VIOLATIONS TABLE statement, see the sysobjstate and sysviolations tables in the Informix Guide to SQL: Syntax.
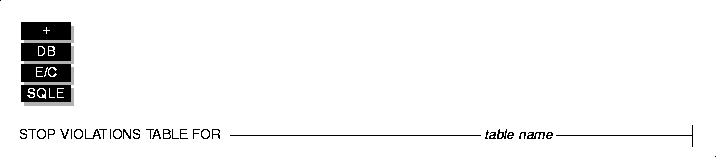
STOP VIOLATIONS TABLE
The STOP VIOLATIONS TABLE statement drops the association between a target table and the special violations and diagnostics tables.
Syntax
Usage
The STOP VIOLATIONS TABLE statement drops the association between the target table and the violations and diagnostics tables. After you issue this statement, the former violations and diagnostics tables continue to exist, but they no longer function as violations and diagnostics tables for the target table. They now have the status of regular database tables instead of violations and diagnostics tables for the target table. You must issue the DROP TABLE statement to drop these two tables explicitly.
When Insert, Delete, and Update operations cause data-integrity violations for rows of the target table, the nonconforming rows are no longer filtered to the former violations table, and diagnostics information about the data-integrity violations is not placed in the former diagnostics table.
Example of Stopping a Violations and Diagnostics Table
Assume that a target table named cust_subset has an associated violations table named cust_subset_vio and an associated diagnostics table named cust_subset_dia. To drop the association between the target table and the violations and diagnostics tables, enter the following statement:
Example of Dropping a Violations and Diagnostics Table
After you execute the STOP VIOLATIONS TABLE statement in the preceding example, the cust_subset_vio and cust_subset_dia tables continue to exist, but they are no longer associated with the cust_subset table. Instead they now have the status of regular database tables. To drop these two tables, enter the following statements:
Privileges Required for Stopping a Violations Table
To stop a violations and diagnostics table for a target table, you must meet one of the following requirements:
References
See the SET and START VIOLATIONS TABLE statements in this manual.
For information on the system catalog tables associated with the STOP VIOLATIONS TABLE statement, see the sysobjstate and sysviolations tables in the Informix Guide to SQL: Syntax.
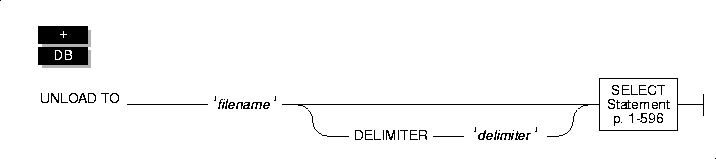
UNLOAD
Use the UNLOAD statement to write the rows retrieved in a SELECT statement to an operating-system file.
Syntax
Usage
To use the UNLOAD statement, you must have the Select privilege on all columns selected in the SELECT statement. For information on database-level and table-level privileges, see the GRANT statement on page 1-461.
The SELECT statement can consist of a literal SELECT statement or the name of a character variable that contains a SELECT statement. (See the SELECT statement on page 1-596.)
The UNLOAD TO File
The UNLOAD TO file contains the selected rows retrieved from the table. You can use the UNLOAD TO file as the LOAD FROM file in a LOAD statement.
The following table shows types of data and their output format for an UNLOAD statement in DB-Access (when DB-Access uses the default locale, U.S. English).
If you are using a nondefault locale, the formats of DATE, DATETIME, MONEY, and numeric column values in the UNLOAD TO file are determined by the formats that the locale supports for these data types. For more information, see the Guide to GLS Functionality. 
The following statement unloads rows from the customer table where the value of customer_num is greater than or equal to 138, and puts them in a file named cust_file:
The output file, cust_file, appears as shown in the following example:
If you are unloading columns of the VARCHAR data type, the database server does not retain trailing blanks.
Unloading Simple Large Objects
The database server unloads simple large objects (BYTE and TEXT columns) directly into the UNLOAD TO file. BYTE data are written in hexadecimal dump format with no added spaces or new lines. Consequently, the logical length of an unloaded file that contains BYTE items can be very long and very difficult to print or edit.
For TEXT columns, the database server handles any required code-set conversions for the data. For more information, see the Guide to GLS Functionality.
If you are unloading files that contain simple large object data types, objects smaller than 10 kilobytes are stored temporarily in memory. You can adjust the 10-kilobyte setting to a larger setting with the DBBLOBBUF environment variable. Simple large objects that are larger than the default or the setting of the DBBLOBBUF environment variable are stored in a temporary file. For additional information about the DBBLOBBUF environment variable, see the Informix Guide to SQL: Syntax.
Unloading Smart Large Objects
The database server unloads smart large objects (BLOB and CLOB columns) into a separate operating-system file on the client computer. It creates this file in the same directory as the UNLOAD TO file. The filename of this file has one of the following formats:
In the preceding formats, the # symbols represent the digits of the unique hexadecimal smart large-object identifier. The database server uses the hexadecimal id for the first smart large object in the file. The maximum number of digits for a smart large-object identifier is 17; however must smart large objects would have an identifier with significantly fewer digits.
When the database server unloads the first smart large object, it creates the appropriate BLOB or CLOB file with the hexadecimal identifier of the smart large object. It appends any additional BLOB or CLOB values to the appropriate file until the file size reaches a limit of 2 gigabytes. If there are still additional smart large-object values, the database server creates another BLOB or CLOB file whose filename contains the hexadecimal identifier of the next smart large object to unload.
Each BLOB or CLOB value is appended to the appropriate file. The database server might create several files if the values are extremely large or there any many values.
In an UNLOAD TO file, a BLOB or CLOB column value appears as follows:
In this format, start_off is the starting offset of the smart large-object value within the file, end_off is the length of the BLOB or CLOB value, and client_path is the pathname for the client file.
For example, suppose the database server unloads the following CLOB values.
If the first CLOB value has a hexadecimal identifier of 203b2, the database server creates the clob203b2 file to hold this first value. It then unloads the next four CLOB values to the clob203b2 file. The corresponding fields in the UNLOAD TO file appears as follows:
|0, 2048, /usr/apps/clob203b2|
|2049, 6145, /usr/apps/clob203b2|
|6146, 7170, /usr/apps/clob203b2|
|7171, 8195, /usr/apps/clob203b2|
|8196, 10244, /usr/apps/clob203b2|
If the database server unloaded additional CLOB values, it would store these values in the clob203b2 file until this file reached a size of 2 gigabytes. It would then create a new file of the form clob########, with the # symbols replaced by the hexadecimal identifier of the first CLOB value in the file.
Unloading Complex Types
In an UNLOAD TO file, complex types appear as follows:
For example, to unload the SET values {1, 3, 4} from a column of the SET (INTEGER NOT NULL) data type, the corresponding field of the UNLOAD TO file appears as follows:
For example, to unload the ROW values (1, 'abc'), the corresponding field of the UNLOAD TO file appears as follows:
DELIMITER Clause
Use the DELIMITER clause to identify the delimiter that separates the data contained in each column in a row in the output file. If you omit this clause, DB-Access checks the DBDELIMITER environment variable.
If DBDELIMITER has not been set, the default delimiter is the vertical bar (|). See Chapter 3 of the Informix Guide to SQL: Syntax for information about setting the DBDELIMITER environment variable.
You can specify the TAB (= CTRL-I) or <blank> (= ASCII 32) as the delimiter symbol. You cannot use the following as the delimiter symbol:
Do not use the backslash (\) as a field separator or UNLOAD delimiter. It serves as an escape character to inform the UNLOAD statement that the next character is to be interpreted as part of the data.
The following statement specifies the semicolon (;) as the delimiter character:
References
See the LOAD and SELECT statements in this manual.
In the Guide to GLS Functionality, see the discussion of the GLS aspects of the UNLOAD statement.
In the Informix Migration Guide, see the task-oriented discussion of the UNLOAD statement and other utilities for moving data.
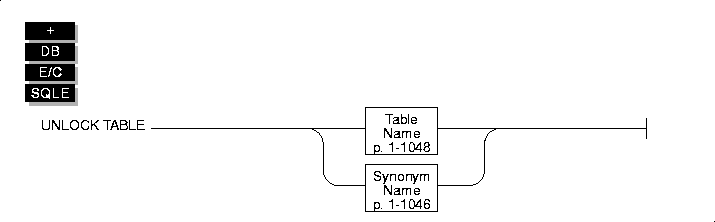
UNLOCK TABLE
Use the UNLOCK TABLE statement in a database without transactions to unlock a table that you previously locked with the LOCK TABLE statement.
Syntax
Usage
You can lock a table if you own the table or if you have the Select privileges on the table, either from a direct grant or from a grant to public. You can only unlock a table that you locked. You cannot unlock a table that another process locked. Only one lock can apply to a table at a time.
The table name either is the name of the table you are unlocking or a synonym for the table. Do not specify a view or a synonym of a view.
To change the lock mode of a table in a database without transactions, use the UNLOCK TABLE statement to unlock the table, then issue a new LOCK TABLE statement.
The UNLOCK TABLE statement fails if it is issued within a transaction. Table locks set within a transaction are released automatically when the transaction completes.
You should not issue an UNLOCK TABLE statement within an ANSI-compliant database. The UNLOCK TABLE statement fails if it is issued within a transaction, and a transaction is always in effect in an ANSI-compliant database.
References
See the COMMIT WORK, ROLLBACK WORK, and LOCK TABLE statements in this manual.
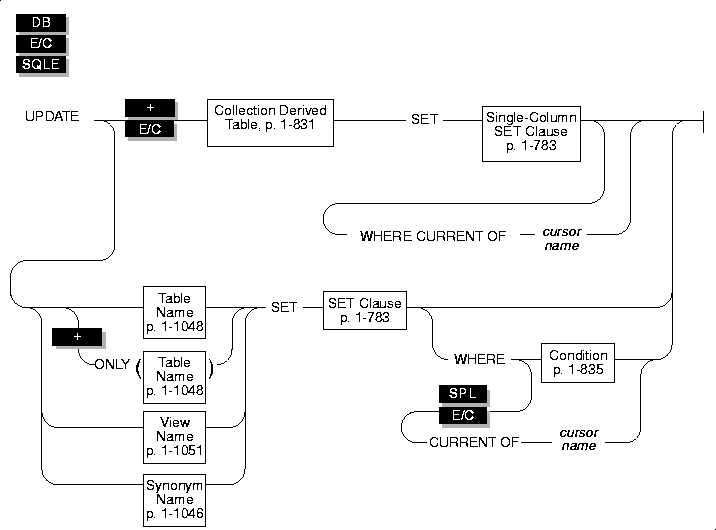
UPDATE
Use the UPDATE statement to change the values in one or more columns or one or more elements in an SPL or INFORMIX-ESQL/C collection variable.
Syntax
Usage
Use the UPDATE statement to update any of the following types of objects:
For information on how to update elements of a collection variable, see "Updating a Collection Variable". The other sections of this UPDATE statement describe how to update a row in a table.
To update data in a table, you must either own the table or have the Update privilege for the table (see the GRANT statement on page 1-461). To update data in a view, you must have the Update privilege, and the view must meet the requirements that are explained in "Updating Rows Through a View".
If you omit the WHERE clause, all rows of the target table are updated.
If you are using effective checking, and the checking mode is set to IMMEDIATE, all specified constraints are checked at the end of each UPDATE statement. If the checking mode is set to DEFERRED, all specified constraints are not checked until the transaction is committed.
If you omit the WHERE clause and are in interactive mode, DB-Access does not run the UPDATE statement until you confirm that you want to change all rows. However, if the statement is in a command file, and you are running from the command line, the statement executes immediately.
Updating Rows Through a View
You can update data through a single-table view if you have the Update privilege on the view (see the GRANT statement on page 1-461). To do this, the defining SELECT statement can select from only one table, and it cannot contain any of the following elements:
You can use data-integrity constraints to prevent users from updating values in the underlying table when the update values do not fit the SELECT statement that defined the view. For further information, refer to the WITH CHECK OPTION discussion in the CREATE VIEW statement on page 1-289.
Because duplicate rows can occur in a view even though the underlying table has unique rows, be careful when you update a table through a view. For example, if a view is defined on the items table and contains only the order_num and total_price columns, and if two items from the same order have the same total price, the view contains duplicate rows. In this case, if you update one of the two duplicate total price values, you have no way to know which item price is updated.
Updating Rows in a Database Without Transactions
If you are updating rows in a database without transactions, you must take explicit action to restore updated rows. For example, if the UPDATE statement fails after updating some rows, the successfully updated rows remain in the table. You cannot automatically recover from a failed update.
Updating Rows in a Database with Transactions
If you are updating rows in a database with transactions, and you are using transactions, you can undo the update using the ROLLBACK WORK statement. If you do not execute a BEGIN WORK statement before the update, and the update fails, the database server automatically rolls back any database modifications made since the beginning of the update.
If you are updating rows in an ANSI-compliant database, transactions are implicit, and all database modifications take place within a transaction. In this case, if an UPDATE statement fails, you can use the ROLLBACK WORK statement to undo the update.
When you use INFORMIX-Universal Server, you are within an explicit transaction, and the update fails, the database server automatically undoes the effects of the update.
Locking Considerations
When Universal Server selects a row with the intent to update, the update process acquires an update lock. Update locks permit other processes to read, or share, a row that is about to be updated but do not let those processes update or delete it. Just before the update occurs, the update process promotes the shared lock to an exclusive lock. An exclusive lock prevents other processes from reading or modifying the contents of the row until the lock is released.
Universal Server allows only one update lock at a time on a row or a page (the type of lock depends on the lock mode that is selected in the CREATE TABLE or ALTER TABLE statements). An update process can acquire an update lock on a row or a page that has a shared lock from another process, but you cannot promote the update lock from shared to exclusive (and the update cannot occur) until the other process releases its lock.
If the number of rows affected by a single update is very large, you can exceed the limits placed on the maximum number of simultaneous locks. If this occurs, you can reduce the number of transactions per UPDATE statement, or you can lock the page or the entire table before you execute the statement.
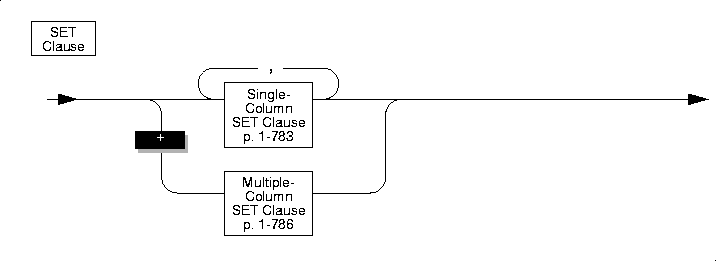
SET Clause
|
The SET clause identifies the columns to be updated and assigns values to each column. The clause supports the following formats:
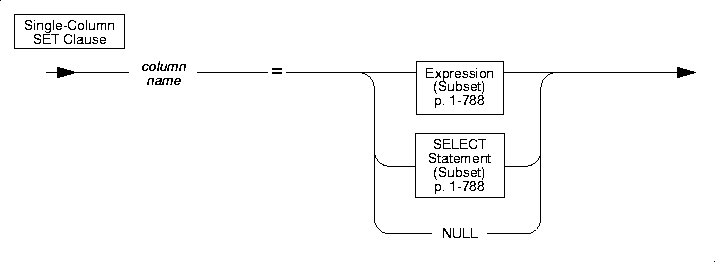
Single-Column SET Clause
You can use a SET clause to set a single column to a single expression. A single column in a SET clause can be a named row type column or an unnamed row type column. When you use UPDATE to update a database column, you can include any number of single-column to single-expressions in the UPDATE statement. The following examples illustrate the single-column to single-expression form of the SET clause:
For more information on the column values that are valid in a SET clause, see "SET-Clause Values". For more information on how to specify values of a row column in a SET clause, see "Updating Row-Type Columns".
If you use UPDATE to update a collection variable (an UPDATE with a Collection Derived Table segment), you can include only one pair of column name and column value. Furthermore, you cannot include complex expressions as the column values. Column values are restricted to literal values or collection variables. For more information, see "Updating a Collection Variable".
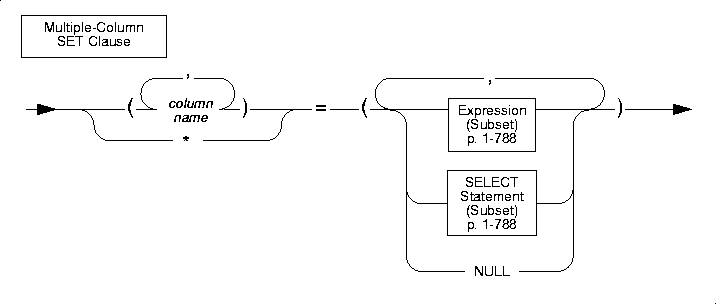
Multiple-Column SET Clause
You can use a second format of the SET clause to set multiple columns to multiple expression. The SET clause offers the following options for listing a series of columns you intend to update:
To complete the multiple-column SET clause, you must list each expression explicitly, placing commas between expressions and enclosing the set of expressions in parentheses. The number of columns in the column list must be equal to the number of expressions in the expression list, unless the expression list includes an SQL subquery. The following examples illustrate this form of the multiple-column SET clause:
An expression list can include an SQL subquery that returns a single row of multiple values as long as the number of columns named, explicitly or implicitly, equals the number of values produced by the expression or expressions that follow the equal sign. The following examples show the use of SQL subqueries in a multiple-column SET clause:
For more information on the column values that are valid in a SET clause, see "SET-Clause Values".
SET-Clause Values
You can express a value in a single-column or multiple-column SET clause in any of following ways:
Subset of Expressions Allowed in the SET Clause
When you update a table or view, you cannot use an expression comprised of aggregate functions in the SET clause. For a complete description of syntax and usage, see the Expression segment on page 1-880.
Subset of SELECT Statements Allowed in the SET Clause
A SELECT statement used in a SET clause can return more than one column of information in a row. However, the SELECT statement cannot return more than one row of information in a table. For a complete description of syntax and usage, refer to the SELECT statement on page 1-596.
Updating a Column to NULL
You can use the NULL keyword to modify a column value when you use the UPDATE statement. For a customer whose previous address required two address lines but now requires only one, you would use the following entry:
Updating Row-Type Columns
You use the SET clause to update a named row type or unnamed row type column. For example, suppose you define the following named row type and a table that contains columns of both named and unnamed row types:
To update an unnamed row type, specify the ROW constructor before the parenthesized list of field values. The following statement updates the name column (an unnamed row type) of the empinfo table:
To update a named row type, specify the ROW constructor before the parenthesized list of field values and use the cast operator (::) to cast the row value as a named row type. The following statement updates the address column (a named row type) of the empinfo table:
For more information on the syntax for ROW constructors, see "Constructor Expressions" in the Expression segment. See also the Literal Row segment on page 1-1003.
The row-column SET clause can only support literal values for fields. To use a variable to specify a field value, you must select the row into a row variable, use host variables for the individual field values, then update the row column with the row variable. For more information, see "Updating a Row Variable".
You can use ESQL/C host variables to insert non-literal values as:
Use a row variable as a variable name in the SET clause to update all fields in a row column at one time.
To insert non-literal values into a row-type column, you can first update the elements in a row variable and then specify the collection variable in the SET clause of an UPDATE statement.
When you use a row variable in the SET clause, the row variable must contain values for each field value. For information on how to insert values into a row variable, see "Updating a Row Variable".
To update only some of the fields in a row, you can perform one of the following operations:
For example, the following UPDATE statement changes only the street and city fields of the address column of the empinfo table:
The address.state field remains unchanged.
- Select the row into a row variable and update the desired fields.
Updating Collection Columns
You can use the SET clause to insert literal values into a collection column, which can be a LIST, MULTISET, or SET. For example, suppose you define the tab1 table as follows:
The following UPDATE statement updates a row in the tab1 table with literal values:
The collection column, list1, in the tab1 row has three elements, and each element is an unnamed row type with an INTEGER field and a CHAR(5) field. For more information on the syntax for literal collection values, see "Literal DATETIME".

You can use an ESQL/C collection variable or an SPL collection variable to update:
Use a collection variable as a variable name in the SET clause to insert an entire collection.
For example, the following ESQL/C code fragment updates with the elements of the a_set host variable the set_col column of the row in the tab_a table whose int_col value is 6:
To update a collection column with non-literal values, you must first update the elements in a collection variable and then specify the collection variable in the SET clause of an UPDATE statement. For information on how to update elements of a collection variable, see "Updating a Collection Variable".
Updating Values in Opaque-Type Columns
Some opaque data types require special processing when they are updated. For example, if an opaque data type contains spatial or multirepresentational data, it might provide a choice of how to store the data: inside the internal structure or, for very large objects, in a smart large object.
This processing is accomplished by calling a user-defined support function called assign(). When you execute the UPDATE statement on a table whose rows contains one of these opaque types, the database server automatically invokes the assign() function for the type. The assign() function can make the decision of how to store the data. For more information about the assign() support function, see the Extending INFORMIX-Universal Server: Data Types manual.
WHERE Clause
The WHERE clause lets you limit the rows that you want to update. If you omit the WHERE clause, every row in the table is updated.
The WHERE clause consists of a standard search condition. (For more information, see the SELECT statement on page 1-596). The following example illustrates a WHERE condition within an UPDATE statement. In this example, the statement updates three columns (state, zipcode, and phone) in each row of the customer table that has a corresponding entry in a table of new addresses called new_address.
Updating and the WHERE Clause
When you update a table in an ANSI-compliant database using an UPDATE statement with the WHERE clause, and the database server finds no matching rows, the database server issues a warning. You can detect this warning condition in either of the following ways:
The database server also sets SQLSTATE and SQLCODE to these values if the UPDATE ... WHERE ... is a part of a multistatement prepare and the database server returns no rows.
In a database that is not ANSI compliant, the database server does not return a warning when it finds no matching rows for the WHERE clause of an UPDATE statement. The SQLSTATE code is `00000' and the SQLCODE code is zero (0). However, if the UPDATE ... WHERE ... is a part of a multistatement prepare, and no rows are returned, the database server does issue a warning. It sets SQLSTATE to `02000' and SQLCODE value to 100.
For additional information about the SQLSTATE code, see the GET DIAGNOSTICS statement in this manual. For information about the SQLCODE code, see the description of the sqlca structure in the Informix Guide to SQL: Tutorial.
WHERE CURRENT OF Clause
 You can use the WHERE CURRENT OF clause to update either of the following objects: You can use the WHERE CURRENT OF clause to update either of the following objects:
You access both of these objects with an update cursor. An update cursor is a sequential cursor that is associated with a SELECT statement but can modify and delete the contents of the cursor. For more information on the update cursor, see page 1-310.
To use the WHERE CURRENT OF clause, you must have previously used the DECLARE statement with the FOR UPDATE clause to define the cursor name for the update cursor. (See the DECLARE statement on page 1-303.)
Before you can use the WHERE CURRENT OF clause, you must declare a cursor with the FOREACH statement. (See the FOREACH statement on page 2-27.)
All select cursors are potentially update cursors in ANSI-compliant databases. You can use the WHERE CURRENT OF clause with any select cursor.
Updating the Current Row

When you specify a table or view name in the FROM clause of the SELECT, the DECLARE statement defines a cursor that populates an active set with the rows of the specified tables or views. The UPDATE...WHERE CURRENT OF statement updates values in the current row of the active set. However, you cannot update a row with a cursor if that row includes aggregates. The cursor named in the WHERE CURRENT OF clause can only contain column names. The UPDATE statement does not advance the cursor to the next row, so the current row position remains unchanged.
To use the WHERE CURRENT OF clause, you must have previously used the DECLARE statement with the FOR UPDATE clause to define the cursor name for the update cursor. (See the DECLARE statement on page 1-303.) If you created the cursor without specifying any columns for updating, you can update any column in a subsequent UPDATE...WHERE CURRENT OF statement.
You can restrict the effect of the WHERE CURRENT OF clause if the DECLARE statement that created the cursor specified one or more columns in the FOR UPDATE clause. In this case, you are restricted to updating only those columns in a subsequent UPDATE...WHERE CURRENT OF statement. The advantage to specifying columns in the FOR UPDATE clause of a DECLARE statement is speed. Universal Server can usually perform updates more quickly if columns are specified in the DECLARE statement.
The following INFORMIX-ESQL/C example illustrates the WHERE CURRENT OF clause of the UPDATE statement. In this example, updates are performed on a range of customers who receive 10-percent discounts (assume that a new column, discount, is added to the customer table). The UPDATE statement is prepared outside the WHILE loop to ensure that parsing is done only once. (For more information, see the PREPARE statement on page 1-541.)
Updating A Collection Element

You declare a collection cursor when you associate a cursor with SELECT statement that includes a Collection Derived Table clause. You use one of the following statements to declare a collection cursor:
For more information, see the FOREACH statement on page 2-27.
A collection cursor is an update cursor by default. However, you can optionally specify the FOR UPDATE clause with the SELECT statement. With an update cursor, you can use the UPDATE...WHERE CURRENT OF statement to update the current element of a collection cursor. For more information, see "Updating a Collection Variable".
Updating a Collection Variable
The UPDATE statement with the Collection Derived Table segment allows you to update elements in a collection variable. The Collection Derived Table segment identifies the collection variable in which to update the elements. For more information on the Collection Derived Table segment, see page 1-831.
In an INFORMIX-ESQL/C program, declare a host variable of type collection for a collection variable. This collection variable can be typed or untyped.
In an SPL routine, declare a variable of type COLLECTION, LIST, MULTISET, or SET for a collection variable. This collection variable can be typed or untyped.
To update elements, follow these steps:
1. Create a collection variable in your SPL routine or ESQL/C program.
2. Optionally, select a collection column into the collection variable with the SELECT statement (without the Collection Derived Table segment).
3. Update elements of the collection variable with the UPDATE statement and the Collection Derived Table segment.
4. Once the collection variable contains the correct elements, you then use the UPDATE or INSERT statement on a table or view name to save the collection variable in the collection column (SET, MULTISET, or LIST).
The UPDATE statement and the Collection Derived Table segment allow you to perform the following operations on a collection variable:
You must declare an update cursor for the collection variable and use UPDATE with the WHERE CURRENT OF clause. For more information on how to use an update cursor with ESQL/C, see the DECLARE statement. For more information on how to use an update cursor with SPL, see "FOREACH".
The application or SPL routine must position the update cursor on the element to be updated and then use UPDATE...WHERE CURRENT OF to update this value. For more information on the WHERE CURRENT OF clause of UPDATE, see page 1-793.
Use the UPDATE statement (without the WHERE CURRENT OF clause) and specify a derived column name in the SET clause.
For example, the following UPDATE changes all elements in the a_list ESQL/C collection variable to a value of 16:
The following UPDATE changes all elements in a_list to the value 16 in an SPL routine:
In these examples, the derived column list_elmt provides an alias to identify an element of the collection. No update cursor is required to update all elements of a collection.
An UPDATE of an element or elements in a collection variable cannot include a WHERE clause. When you use UPDATE to update a collection variable, you can only include one pair of column-name and column-value. Furthermore, you cannot include complex expressions as the column values. Column values are restricted to literal values or collection variables.
The collection variable stores the elements of the collection. However, it has no intrinsic connection with a database column. Once the collection variable contains the correct elements, you must then save the variable into the collection column with one of the following SQL statements:
Suppose that the set_col column of a table called table1 is defined as a SET and that it contains the values {1,8,4,5,2}. The following ESQL/C program changes the element whose value is 4 to a value of 10.
After you execute this ESQL/C program, the SET column in table1 contains the values {1,8,10,5,2}.
This ESQL/C program defines two collection variables, a and b, and selects a SET from table1 into b. The WHERE clause ensures that only one row is returned. Then, the program defines a collection cursor, which selects elements one at a time from b into a. When the program locates the element with the value 4, the first UPDATE statement changes that element value to 10 and exits the loop.
In the first UPDATE statement, x is a derived column name used to update the current element in the collection derived table. The second UPDATE statement updates the base table table1 with the new collection. For information on how to use collection host variables in an ESQL/C program, see the discussion of complex data types in the INFORMIX-ESQL/C Programmer's Manual.
The following SPL routine performs the same task as preceding ESQL/C program.
After you execute this SPL routine, the SET stored in table1 will contain the values {1,8,10,5,2}. This SPL routine defines two collection variables, a and b, and selects a SET from table1 into b. For more information on how to use SPL collection variables, see Chapter 14 in the Informix Guide to SQL: Tutorial.
You can also use a collection variable as a variable name in the SET clause to update all elements of a collection. For more information, see "Updating Collection Columns".
Updating a Row Variable
The UPDATE statement with the Collection Derived Table segment allows you to update fields in a row variable. The Collection Derived Table segment identifies the row variable in which to update the fields. For more information on the Collection Derived Table segment, see page 1-831.
To update fields, follow these steps:
1. Create a row variable in your ESQL/C program.
2. Optionally, select a row-type column into the row variable with the SELECT statement (without the Collection Derived Table segment).
3. Update fields of the row variable with the UPDATE statement and the Collection Derived Table segment.
4. Once the row variable contains the correct fields, you then use the UPDATE or INSERT statement on a table or view name to save the row variable in the row column (named or unnamed).
The UPDATE statement and the Collection Derived Table segment allow you to update a particular field or group of fields in the row variable. You specify the new field value(s) in the SET clause. For example, the following UPDATE changes the x and y fields in myrect ESQL/C row variable:
Suppose that after the SELECT statement, the myrect2 variable has the values x=0, y=0, length=8, and width=8. After the UPDATE statement, myrect2 variable has field values of x=3, y=4, length=8, and width=8.
You cannot use a row variable in the Collection Derived Table segment of an INSERT statement. However, you can use the UPDATE statement and the Collection Derived Table segment to insert new field values into a row host variable, as long as you specify a value for every field in the row. For example, the following code fragment inserts new field values into the myrect row variable and then inserts this row variable into the database:
If the row variable is an untyped variable, you must use a SELECT statement before the UPDATE so that ESQL/C can determine the data types of the fields. An UPDATE of a field or fields in a row variable cannot include a WHERE clause.
The row variable stores the fields of the row. However, it has no intrinsic connection with a database column. Once the row variable contains the correct field values, you must then save the variable into the row column with one of the following SQL statements:
For more information on how to use SPL row variables, see Chapter 14 in the Informix Guide to SQL: Tutorial. For more information on how to use ESQL/C row variables, see the discussion of complex data types in the INFORMIX-ESQL/C Programmer's Manual.
References
See the DECLARE, INSERT, OPEN, and SELECT statements in Chapter 1 of this manual. See also the FOREACH statement in Chapter 2 of this manual.
In the Informix Guide to SQL: Tutorial, see the discussion of the UPDATE statement in Chapter 6 and Chapter 12. In the Guide to GLS Functionality, see the discussion of the GLS aspects of the UPDATE statement.
For information on how to access row and collections with ESQL/C host variables, see the discussion of complex data types in the INFORMIX-ESQL/C Programmer's Manual.
|
 An element in a collection variable