- Choose Components > Maps > Load Map from the HPL main
window.
The Record Maps window appears, as Figure 87 shows.
Figure 87. The Load Record Maps Window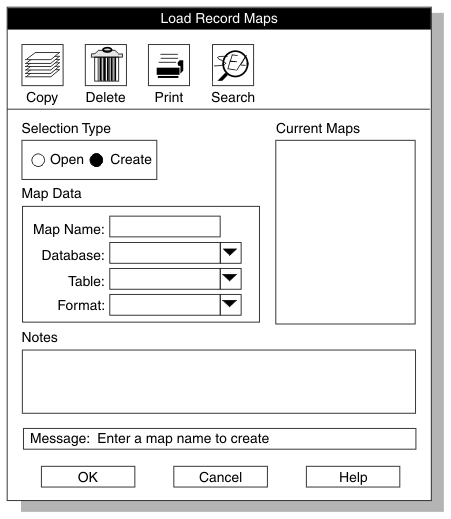
- Click Create in the Selection Type group.
- Choose a name for the map and type it in the Map Name text box.
- Type the names of the database and table where the data will
be loaded in their corresponding text boxes.
You can also click the down arrow to choose the names from a selection list. The Tables selection list includes synonyms that are valid for the local database server.
- Type the format that describes the data file in the Format text
box.
You can also click the down arrow to choose the format from a selection list.
- Click OK to open the map-definition window.
A map-definition window similar to Figure 88 appears.
- Click a column icon in the left-hand column in the Table pane and hold the mouse button down. A box appears around the icon and its name.
-
Drag the box to a field icon in the Format pane.
When you connect columns to fields, it does not matter whether you drag a column to a field or drag a field to a column, but you must always connect items from the left-hand column of each pane.
Figure 88 shows a map-definition window with this step completed.
- Repeat steps 7 and 8 for each field that you want to transfer into the database.
- Add desired options, if any.
For instructions, see Using Mapping Options.
- Click OK to return to the Load Record Maps window.
