Using BladePack
To package your DataBlade module, you add content to a BladePack project, assign components, customize the installation procedure, and build the package.
To build an installation package with BladePack
1. Open a project file:
2. Define the content of your product, including files, directories, and registry changes.
3. Define and assign installation components.
4. Define optional customizations.
5. Build the installation package.
6. Revise on-line help for the installation package.
7. Transfer files from the build area to installation media.
Establishing Content
You can add these objects to your product in BladePack:
For a DataBlade module, you need the project.bld file and the SQL script files. These files are automatically added to the Files to Install folder when you open a project.prd file.
In addition, consider adding documentation, help, applications, and other files to support your DataBlade module.
If the version of your DataBlade module you are packaging is an upgrade, you might need to specify files or directories to delete in the old installation.
If you DataBlade module runs on Windows NT, you might have to specify registry changes. 
To add a file or directory or a change to the registry
1. Choose Edit  Insert object, where object is File to Install, File to Delete, Directory to Install, Directory to Delete, or Change to Registry. Insert object, where object is File to Install, File to Delete, Directory to Install, Directory to Delete, or Change to Registry.
The object appears on the Files/Directories page.
2. Specify the properties of the object on the Details and other pages in the item view.
The following sections describe the properties of the objects on the Files/Directories page.
Files and Directories to be Installed or Deleted
The following table lists properties you define when you add files and directories to install or delete.
Local Paths for Files for Multiple Operating Systems
If you have files that are operating system-specific, put them in a directory structure that is the same except for one directory, which is named for the operating system. When you add the file to your BladePack project, replace the directory named for the operating system with %OS%.
For example, if you compile your DataBlade module on Sun Solaris and Windows NT, you have two project.bld files, one in each of these directories:
Add the project/src/c/Solaris-sparc/project.bld file to the Files to Install folder, then replace Solaris-sparc with %OS%. When you build the BladePack project for Sun Solaris and Windows NT, BladePack adds the appropriate project.bld file to each project.
Specifying a Target Directory
The following table lists the options in the list for the Directory on target machine field.
The target directory for the DataBlade module files (project.bld and the SQL scripts) should be the extend/project directory under the $INFORMIXDIR directory.
File Sharing Options
File sharing options are valid for Windows NT installations only. For files in the Files to Install folder, choose one of these file sharing options from the Copy Options page:
Registry Changes
You can add entries to the Windows NT registry for the initialization and configuration of your DataBlade module and its associated programs.
Refer to your Microsoft Developer Studio documentation for information about the registry.
To add registry changes
1. Choose Edit Insert Change to Registry.
2. Fill in the Registry Changes Details page in the item view.
The following table lists the properties you define when adding registry changes.
Managing Components
BladePack allows you to organize your product installation package into three layers: component, subcomponent, and shared component. To see the component hierarchy for your product, click the Components tab in the project view.
Organizing an installation package into a component structure allows you to define Typical, Compact, and Custom installations. You specify whether each component or subcomponent is included in the Typical and Compact installations, and whether it is initially selected when users choose the Custom installation.
Use a shared component for those portions of your product that are shared by more than one component. A shared component is always installed with the component or subcomponent with which it is associated.
During a Custom installation, users can choose to install any components or subcomponents. When you mark a component Custom, the component is initially selected. The user can choose to include or exclude any components, except shared components, from the installation.
In most cases, the component level is sufficient to create Typical, Compact, and Custom installation options. For example, suppose you have created the following components (and no subcomponents) in your installation package, and marked them as shown:
In this scheme, users install the DataBlade module, help files, and examples if they choose the Typical installation. If they choose the Compact installation, they install the DataBlade module only. If they choose the Custom installation, the DataBlade module and debugging support are preselected. They can choose to add help and examples.
To create a component
1. Choose Edit Insert Component.
2. Complete the properties on the Component Details page in the item view.
To create a subcomponent
1. Select the component to which you want the subcomponent to be subordinate.
2. Choose Edit Insert Subcomponent.
3. Complete the properties on the Component Details page in the item view.
To create and copy a shared component
1. Select the component to which you want the shared component to be subordinate.
2. Choose Edit Insert Shared Component.
3. With the shared component still selected, choose Edit Copy.
4. Select another component to which you want to add the shared component.
5. Choose Edit Paste.
Component Properties
The following table lists the properties of components and subcomponents you define when creating one.
Shared components have one property: an identifier that is assigned by BladePack. You can edit the identifier; it can be an alphanumeric string up to 128 characters. Make sure it is unique among shared components. If you change an identifier, be sure to update it for every instance of that shared component.
Assigning to Components
You must assign every item on the Files/Directories and Customization pages to a component, subcomponent, or shared component. If you try to build the project with unassigned items, the build fails and you receive an error message telling you which item is not assigned to a component.
Initially, all files and directories that appear on the Files/Directories page are listed under the Unassigned Files and Directories folder on the Components page. Custom extensions are not shown on the Components page.
To assign an item to a component, use one of these methods:
Customizing the Installation
Custom extensions for the installation program are optional.
For Windows installation packages, you can add these custom extensions:
For UNIX installation packages, you can add custom programs to call from the installation program.
In addition to adding the custom routines, dialog boxes, and programs in their respective folders, you must also add the file containing the custom extension to the Support Files folder. However, if you have more than one routine, dialog box, or program in a file, you need only add that file to the Support Files folder once.
To add a custom routine, dialog box, or program
1. Choose Edit Insert Item, where Item is Custom DLL Routine, Custom DLL Dialog, or Custom Program.
2. Complete the Details page in the item view.
3. Choose Edit Insert Support File.
4. Type the path and filename of the file containing the custom routine, dialog box, or program or click Browse to select the file from the Open dialog box.
To add a Read Me file
1. Choose Edit Insert Readme File.
2. Type the path and filename or click Browse to select the file from the Open dialog box.
The following table lists the properties of custom routines, dialog boxes, and programs you specify when you add one to your installation project.
Building the Installation
When the content and organization of your installation package are complete, build and test it.
To build, choose Build Build Installation. The Build Installation wizard is launched and prompts you for the following information:
Choose one from the list. Build a separate package for every platform.
This can be any directory. By default it is the project\install directory.
You can bundle more than one project together in a single installation.
Installation Type
BladePack creates a directory structure in the target directory and copies files into the tree. When you build an interactive installation package for Windows, BladePack calls InstallShield to process the files and create CD-ROM and diskette images. If you build an interactive installation for a UNIX platform, BladePack includes install and uninstall shell scripts.
When you build a file tree installation, BladePack creates the file tree specified in the project in the target directory. A file tree build is useful for debugging the BladePack project.
After you successfully build an interactive installation, the target directory contains the subdirectories described in the following table.
Installation Screen Display Text
BladePack provides default text strings for the InstallShield installation wizard screens for Windows. You can override some of these text strings. For example, in the Select Installation Type wizard, you can change the text that appears next to the words Typical, Compact, and Custom to provide your own definitions for these three types of installations. When you save a BladePack project, BladePack saves any new string definitions in the appropriate string files.
You can change the title of the Main Screen screen. The default title is Installation for Project, where Project is the name of your BladeSmith project.
The InstallShield wizard screens, with the default text provided by BladePack, are shown in the following figures.
You can edit the instructions at the top of the Installation Options screen and the text to the right of the words Typical, Compact, and Custom with BladePack.
You can edit the instructions at the top of the Select Installation Components screen with BladePack.
You can edit the instructions at the top of the Select Folder for Informix Applications screen and the default program folder with BladePack.
You can edit the instructions at the top of the Ready to Install screen with BladePack.
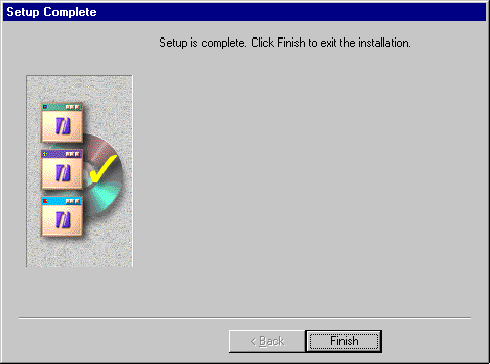
You can edit the instructions at the top of the Setup Complete screen with BladePack.
You can edit the instructions at the top and the bottom of the Setup Complete, Reboot Required screen with BladePack.
Creating Distribution Media
To ensure that customers can install DataBlade modules and other Informix products using common instructions, the product you distribute to must conform to the Informix DataBlade module installation standard. BladePack creates an interactive installation that ensures a consistent user interface.
To install a product from diskettes on a Windows platform, the installer executes the Setup.exe program on the first diskette. To create diskettes, copy the contents of the disk1 ... diskn directories to formatted 1.4 MB diskettes.
To create all other types of media, use the cdrom directory in the build area.
Copy the renamed directory and its contents to the media or into the archive file. This makes it possible to distribute multiple products with their own installations on a CD-ROM or tape.
For example, to install the Circle DataBlade module from CD-ROM, the installer mounts the CD-ROM, changes to the circle subdirectory, and executes Setup (Windows platforms) or install (UNIX platforms).
To install the Circle DataBlade module from a file named circle3.6.tar, retrieved through a local network or the Internet, the installer extracts the file into a temporary directory, changes to the circle subdirectory, and executes install. When the installation has finished, the circle subdirectory can be removed.
|