- Choose Jobs > Unload from the HPL main
window.
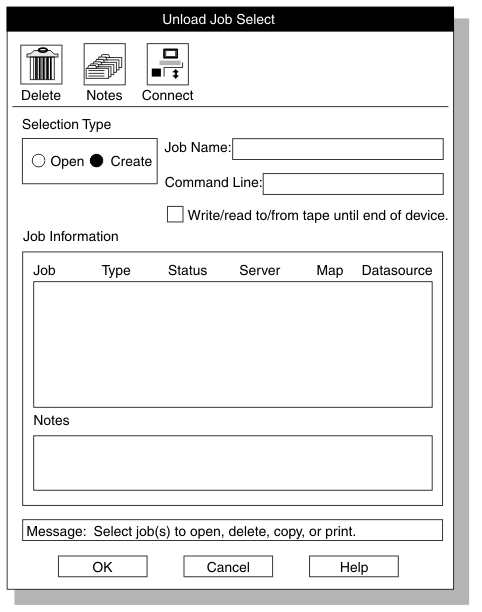
The Unload Job Select window appears, as Figure 103 shows.
- Click Create in the Selection Type group.
- Choose a name for this unload job and type the name in the Job Name text box.
- Optionally check the Write/read to/from tape until end of device check box. For more information, see Specifying to Write to the End of the Tape.
- Click OK.
The Unload Job window appears, as Figure 104 shows. Using the High-Performance Loader Windows, provides detailed descriptions of the buttons in the Unload Job window.
- Type appropriate values for all of the unload components.
If you click a component button, the corresponding view window opens, and you can create or select the component.
- Specify the file that contains rejected records.
Use one of these methods:
- Type the name of the rejected file in the Discards Records text box.
- Click the down arrow next to the Discard Records text box to select the filename from the file-selection list.
-
Select the file that contains the unload
status log.
Use one of these methods:
- Type the name of the log file in the Logfile text box.
- Click the down arrow next to the Logfile text box to select a filename from the file-selection window.
- Click Options to change unload options.
For more information, see Changing the Unload Options.
- Click Save to save this unload job. (If you click Run to run the job immediately, the job is saved automatically.)
-
Now you can either run the unload job
or exit and run the job later.
- Click Run to run the job.
- Click Cancel to exit to the Unload Job Select window.

Important:
Use Ext Type String Length data
type or Ext Type Binary Length data type if you unload data that
contains null UDT values.